


Are you missing images in WordPress? If you are noticing missing images on your WordPress Posts or Pages seemingly at random there a few steps you can take to resolve this issue. There are a few different reasons and causes as to why this happens.
In this article, we will discuss How to Fix Missing Images in WordPress Posts or Pages and the steps you can take to resolve most of the common reasons why you’re WordPress site is missing images. This guide is broken down into sections. We recommend following this guide sequentially for the best results. Try the steps we’ve outlined below to help get your WordPress site back in working order.
Before we Begin:
→ Preliminary Checks
→ Bypass Server Cache – Rule Out Caching Issues
→ Make a Backup
In this Article:
→ Rule Out Actual Missing Image
→ Check .htaccess
→ Regenerate WordPress Media
→ Check Permissions
→ Define Uploads Folder
→ Check PHP Settings
→ Check PHP Version
→ Identify Plugin & Theme Issues
Before We Begin: Preliminary Checks
To ensure the best possible outcome, before you continue troubleshooting please follow the preliminary steps we’ve advised below. It is best to perform these steps before making any changes to your website or performing any troubleshooting.
Before we begin: Bypass Server Cache
It’s a good idea to check the pages with server cache layer bypassed to rule out any caching issues. You can do this by adding the following to the end of your web page URL:
/?no-cache
So if your website page address is:
https://example.com/my-page/
You’d test it without the server cache like this:
https://example.com/my-page/?no-cache
Before we begin: Make a Backup
Step 1. Make a Backup of your WordPress site and Database.
Rule Out Actual Missing Images: 404 Image not Found!
If you are seeing a ‘404 Image not Found‘ error or are seeing alternative text on your Posts or Pages instead of your image, you will first want to confirm the image file still exists on the server first and foremost. Images can become corrupted or deleted accidentally.
1. Get the FilePath for the image: Right-Click on the image then select ‘Copy Image Address‘. This will place the relative file path of the missing image in your clipboard.
2. Paste the URL you’ve copied into your browser’s address bar and Press Enter.
If you see an image this means it exists on the server and something in your WordPress site is preventing your image from displaying.
You may Need to → Regenerate your WordPress Media Files.
If you do not see an image, the image file may be missing or corrupt.
SOLUTION: You can try deleting the image from the WordPress media section, re-uploading the image and then inserting it into your page or post once more.
If you’re seeing a white page instead of the image, this happens when you have resized an image on your page or post from the original image size. This can generally be resolved by regenerating your image thumbnails in WordPress. Continue following the troubleshooting steps outlined in our article below.
Replace .htaccess with the Default for WordPress
Sometimes the .htaccess file that comes included in WordPress can become corrupted. This is usually caused by plugins or themes writing to the file or something interrupting the process during which changes were being made to the file. You can resolve this by replacing the current .htaccess file with the default WordPress .htaccess file.
→ Click Here to View our guide on How to Replace .htaccess with the Default for WordPress
Regenerating WordPress Media Files
WordPress automatically scales and generates thumbnails for your images. This also happens when you insert an image into a page then resize the image. Sometimes these image files can become corrupted or are not generated properly or something else has interrupted the process. You can generally resolve this by Regenerating Media Files in WordPress.
1. Install and Activate the Force Regenerate Thumbnails Plugin

→ Click Here for Help Installing WordPress Plugins
2. From the WordPress Dashboard, hover over ‘Tools‘ then select ‘Force Regenerate Thumbnails‘

Step 3. On the next screen, click on the ‘Regenerate all Thumbnails‘ button.

Step 4. On the next screen, you should see a progress bar and a confirmation message once the process is complete. The time it takes depends on many factors including the number of images you have stored in your WordPress site. Be sure you allow adequate time for the process to complete.

Check Folder Permissions for WordPress Uploads Folder
Step 1. Login to your WordPress Dashboard
Step 2. Hover over ‘Settings‘ then Select ‘Media‘

Step 3. Check the option ‘Organize my uploads into month- and year-based folders‘ (if not already checked) then press the ‘Save Changes‘ button

Step 4. Login to cPanel then click on ‘File Manager‘
![]()
Step 5. Navigate into the Document Root for your WordPress website (where your WordPress site files are stored)
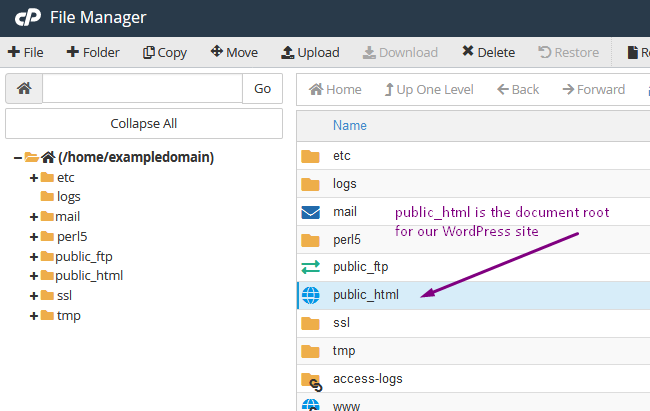
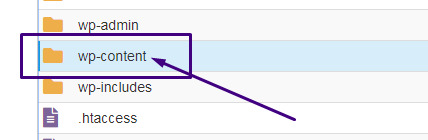
Step 6. Navigate into your ‘ /wp-content ‘ folder
Step 7. Locate the ‘Uploads’ folder then ‘Right-Click‘ the folder and select ‘Change Permissions‘.

Step 8. Check or Uncheck the boxes until the permissions read: 755

See our animated Example of the Process Below:
Clear the Server Cache and then your Browser Cache, then refresh your Posts and Pages to confirm the images are displaying properly. If the images are still not displaying or some are missing continue troubleshooting.
Define Your WordPress Uploads Folder
You may need to Define your WordPress Uploads folder in your ‘wp-config.php‘ file.
This tells WordPress where to look for your image uploads in order to serve them properly within your Posts and Pages.
To define your WordPress Uploads folder/directory, follow the steps outlined below:
Step 1. Login to cPanel and select ‘File Manager‘ (or use your favorite FTP program instead)
![]()
Step 2. Navigate into the document root of your website (where your WordPress files are stored)
Note! The document root is usually the ‘public_html’ folder for your primary domain.
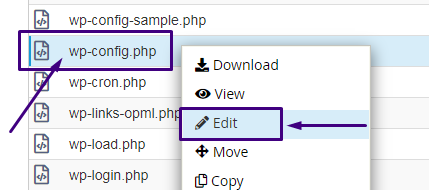
Step 3. Right Click on ‘wp-config.php‘ and select ‘Edit‘
Step 4. Copy the Following Code:
define( 'UPLOADS', 'wp-content/uploads' );
Step 5. Paste the Code into your ‘wp-config.php‘ file somewhere towards the end of the file as in our Example Below:
Step 6. Click ‘Save Changes‘ in the top Right-Hand corner of File Manager.

Check and Adjust Your PHP Settings
WordPress is a CMS (Content Management System) built in PHP. The PHP settings in your hosting account can have an effect on the way images display within your WordPress website. You can try adjusting a few of the settings we’ve outlined below to see if your PHP settings are having an effect on the way your images are being displayed.
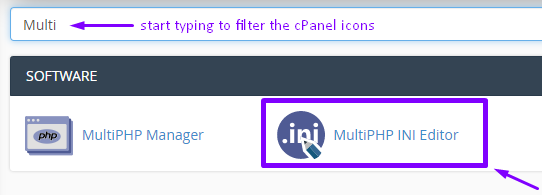
Step 1. Login to cPanel
Step 2. Click on the ‘MultiPHP INI Editor‘ icon under the Software section.
Step 3. Select your WordPress domain name from the drop-down list.
On the next page, you will see a list of PHP settings. The directives you will want to increase are:
-
- max_execution_time
- max_input_time
- max_input_vars
- memory_limit
- upload_max_filesize
There is no special, magic number to increase the values to. Generally, you will want to start by making small adjustments and go from there. It is not recommended to increase these values to the maximum values as it can be a detriment to the security and performance of your Hosting account and sites. But making small adjustments is generally fine.
Note! If you need a baseline to work off of, try the following settings first then increase the values as needed from there:
-
- max_execution_time = 600
- max_input_time = 600
- max_input_vars = 1000
- memory_limit = 512M
- upload_max_filesize = 512M
Step 4. Increase the necessary values as shown above then click ‘Apply‘ at the bottom of the page to apply your settings.
Remember to Clear Server Cache and Browser Cache then check your WordPress site to see if your images are now displaying.
If the images are still not displaying in your WordPress site, you should continue troubleshooting.
Change your PHP Version to the Latest Version
WordPress is a PHP application. If you’re WordPress site, Theme and Plugins are all up to date they should be compatible with the latest versions of PHP. Sometimes they are not backwards compatible with older versions of PHP which can cause errors or undesirable effects in your site. Thus, it’s important to ensure your using the latest PHP version. You can change the PHP version that is processing PHP applications for your Domains easily using the MultiPHP Manager in cPanel.
→ Click Here to View our Guide on How to Change the PHP version for your Domain in cPanel
Identify Plugin and Theme Issues
If all of the steps above have not resolved your issue, it may be time to start looking into plugins and themes as the possible culprits. You can follow common troubleshooting procedures for WordPress Plugins and Themes to identify an issue.
If a Plugin or Theme is found to be the culprit you can try either replacing the Plugin or Theme with a comparable alternative, deactivating the Plugin, or reaching out to the Plugin or Theme Developer Directly to report and request assistance with the issue.
To start ruling out your Plugins and Themes as the possible issue, follow the steps we’ve outlined below:
Update WordPress Core, Plugins and Themes
Important updates for WordPress are rolled out periodically to ensure the security and stability of your WordPress site(s). The same can be said for Plugins and Themes. You will want to make a backup, then apply any available updates to the WordPress Core, Plugins and Themes to rule out issues with version compatibility.
Switch to a Default WordPress Theme to Rule out Theme Issues
Change your WordPress Theme to something like Twenty Twenty Two to rule out issues with your theme.
If your images are displaying after changing your theme it’s time to contact the developer of your theme for assistance with the issue.
If switching your theme hasn’t resolved your issue, you can switch your theme back to the original theme you were using and continue troubleshooting.
Rename your Plugins Folder to Rule Out Plugin Issues
Rename your WordPress Plugin Folder to something temporary to rule out an issue with your Plugins. Once you’ve renamed the Plugins folder you can refresh your website (after clearing the server cache and browser cache) and check to see if the missing images are now displaying.
If the images are displaying after renaming the plugins directory, you’ve successfully isolated the issue to a plugin or plugins as the cause. If not, then you can rule out Plugins as a possible cause.
To rename your Plugins directory, follow the steps outlined below:
Step 1. Login to cPanel
Step 2. Click on the ‘File Manager‘ icon.
![]()
Step 3. Navigate into the Document Root for your WordPress site.
Step 4. Navigate into your ‘/wp-content‘ folder.
Step 5. Locate the ‘plugins‘ folder. Right-click the folder then select the option ‘Rename‘.
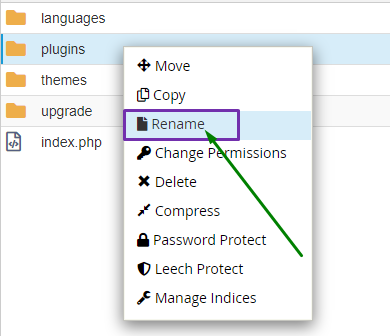
Step 6. Rename the folder to ‘plugins.BAK‘ then click ‘Rename File‘ to save your changes.
Step 7. Clear the server Cache, as well as your Browser Cache then refresh your Website to see if you’re images are displaying.
Deactivate Plugins One By One to Isolate the Problem Plugin
If after renaming your Plugins folder that your images are now displaying, you will need to deactivate your plugins one by one to determine which plugin or plugin(s) are causing an issue. Once you have identified the plugin, reach out to the plugin developer for assistance with the issue.
If this is a very rare case and your images still aren’t displaying after trying all of the steps outlined in our guide, please reach out to us for help.
GlowFrog customers enjoy expert support for Troubleshooting WordPress Plugins. If you have a lot of plugins, open a chat with us for assistance.
Not a current GlowFrog customer? Sign up for one of our Managed WordPress plans and enjoy a free, fast migration within 24 hours.
")