There are many ways to check your email. Including, downloading your email into an email client either on your phone, tablet or computer.
In order to download your email directly to your device, you may be wondering, how do I setup my email in my email client?
In this article, we will go over how to setup your email in your email client on a phone, tablet and computer.
In this Article:
→ Where do I find my email settings?
→ How do I setup my email in my iphone?
→ How do I setup my email in my Android?
→ How do I setup my email in Thunderbird?
→ How do I setup my email in Microsoft Outlook?
In another Article:
→ How do I check my email?
→ How do I create an Email Account?
→ How do I reset or change my email password?
Where do I find my email settings?
In order to manually configure your email account you will need to use your email settings. To find these settings, you’ll need to access your cPanel account.
1. Login to your GlowFrog Account
2. Access your cPanel account
3. Click ‘Email Accounts‘
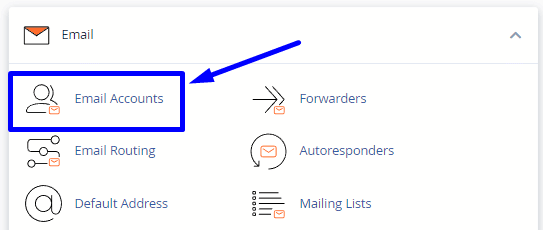
5. Next your email address/account click ‘Connect Devices‘

6. Scroll down to the section ‘Mail Client Manual Settings‘
Your email settings will be displayed in a table as in the following example:
| Username: | example@exampledomain.com |
| Password: | Use the email account’s password. |
| Incoming Server: | mail.exampledomain.com
|
| Outgoing Server: | mail.exampledomain.com
|
|
IMAP, POP3, and SMTP require authentication.
|
|
You can use these settings from the table and enter them into your email client manually to finish setting up your email account.
How do I setup Email in my iPhone?
To setup email on your iPhone, using your iPhone device follow these steps:
1. Login to your GlowFrog Account
2. Access your cPanel account
3. Click ‘Email Accounts‘

5. Next your email address/account click ‘Connect Devices‘

6. Under the ‘Mail Client Automatic Configuration Scripts‘ section, locate the ‘iOS for iPhone/iPad/iPod and MacOS® Mail.app®‘ option and click on the link ‘IMAP over SSL/TLS‘ to download the automatic script.
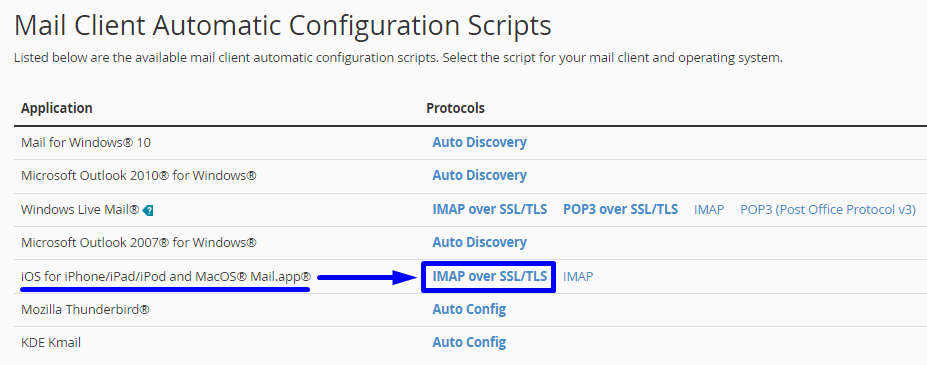
Once the file downloads, open it and follow the rest of the steps to finish setting up your email.
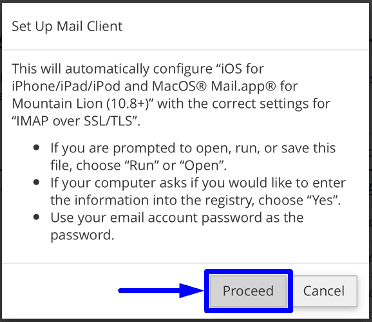
7. Tap ‘proceed‘ on the next popup
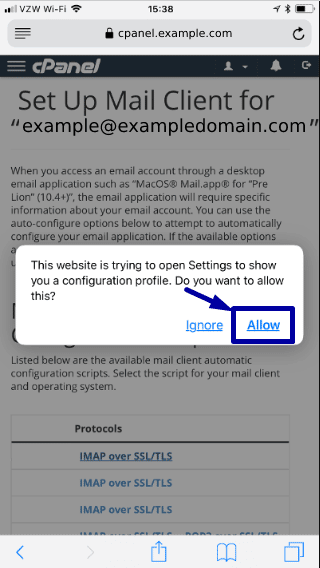
8. Tap ‘Allow‘ to allow the script to run
9. Ensure the correct email account is being setup and tap ‘Install‘
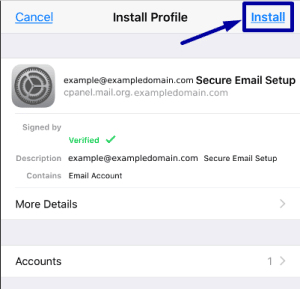
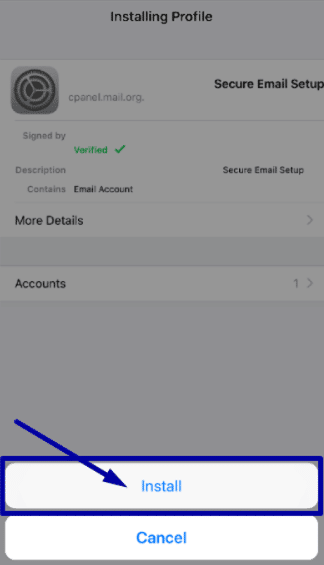
10. If you are promoted for a passcode, enter your iPhone Passcode (NOT your email password).
11. Tap ‘Install‘ once more.
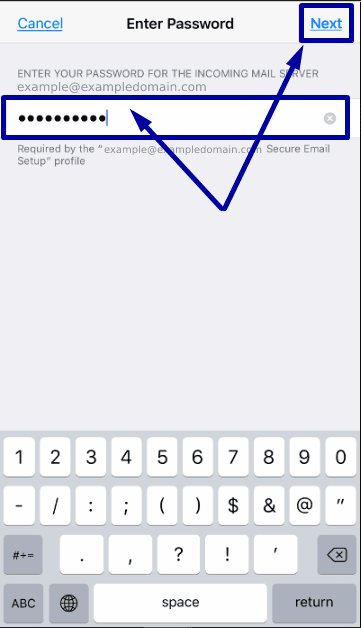
12. Now you can enter your email password and click ‘Next‘
Forgot your email password? → See How to Change my Email Password
13. On the next screen, tap ‘Done‘

That’s it! You’ve successfully setup your email in your iPhone device.
How to Setup email on my Android Phone
Because many Android phones are different, the steps will vary. You can use the following steps as a general guide, regardless of your phone type/model. In our example, we are using the Samsung Email App.
Refer to your phone carrier for additional help.
1. Look for an App on your phone labeled ‘Email‘
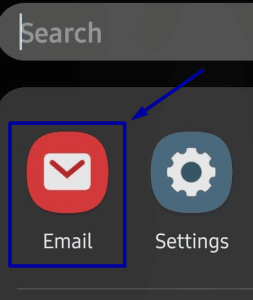
Note: If you do not have an app labeled ‘Email’ on your phone, you can download one from the Playstore. Consider using Samsung Email, Outlook or Gmail. Be careful installing apps from vendors you do not know! Apps from other vendors can often contain unwanted items such as adware.
2. Locate the ‘settings‘ option inside the app, then tap ‘Add Account‘
3. On the Add Account screen, choose the ‘other‘ option
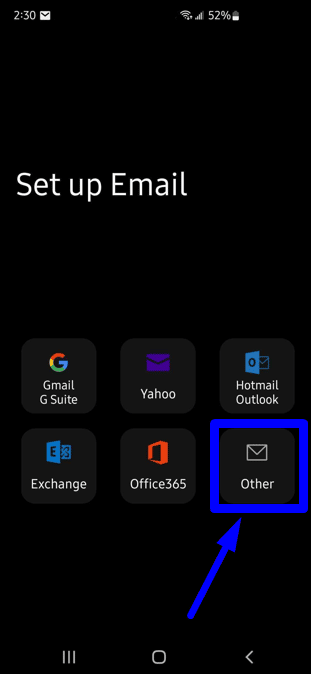
4. On this screen, enter your full email address as the username and email account password, then tap ‘Manual Setup‘
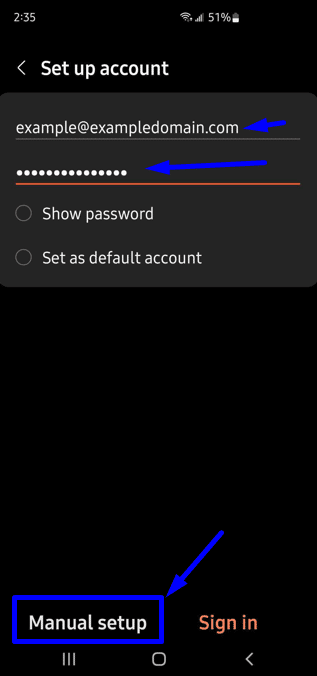
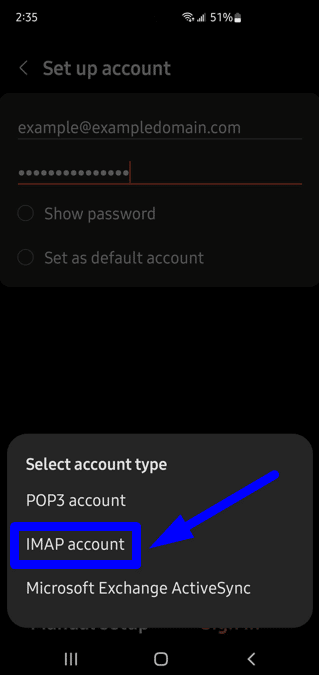
5. On this next screen, Select your email account type as ‘IMAP account‘.
6. On this screen, enter your email settings for your email account. (use the Secure SSL/TLS Settings)
→ Refer to Where do I find my email settings? to locate the settings you’ll need for this screen.
Example:
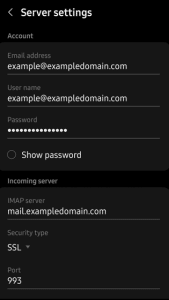
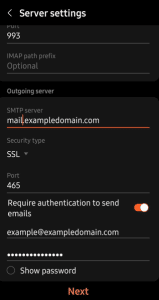
7. Leave the ‘Require authentication to send emails‘ option enabled, then Tap ‘Next‘
That’s it! Your android should now start synchronizing your email. If you get an error message that the account couldn’t be verified, you may need to reset your email password.
Note: Sometimes changing your email account password will fix this issue EVEN when you know your password is correct.
For additional help, contact your phone carrier or reach out to our support.
How to Setup Email in Thunderbird
Don’t have Thunderbird? It’s free, you can download it here: https://www.thunderbird.net/en-US/
1. Open Thunderbird on your device
2. Click on the hamburger menu then ‘Account Settings‘
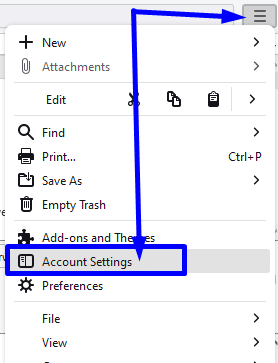
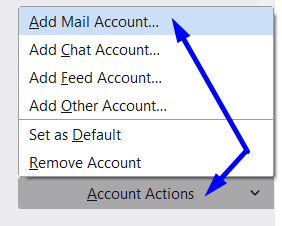
3. On the left, under ‘Account Actions‘ click ‘Add Account‘
4. On the next screen, enter your name and full email address. Then click ‘Next‘
5. Thunderbird will attempt to locate the settings for your domain. On the next screen, make sure your username is set to your FULL email address and IMAP is selected.
If you do not see your full email address as the username, click ‘Configure Manually‘.
Otherwise, click next and complete the setup.
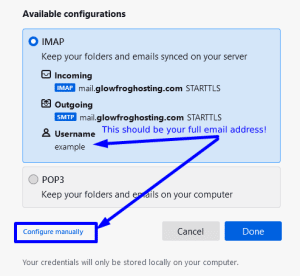
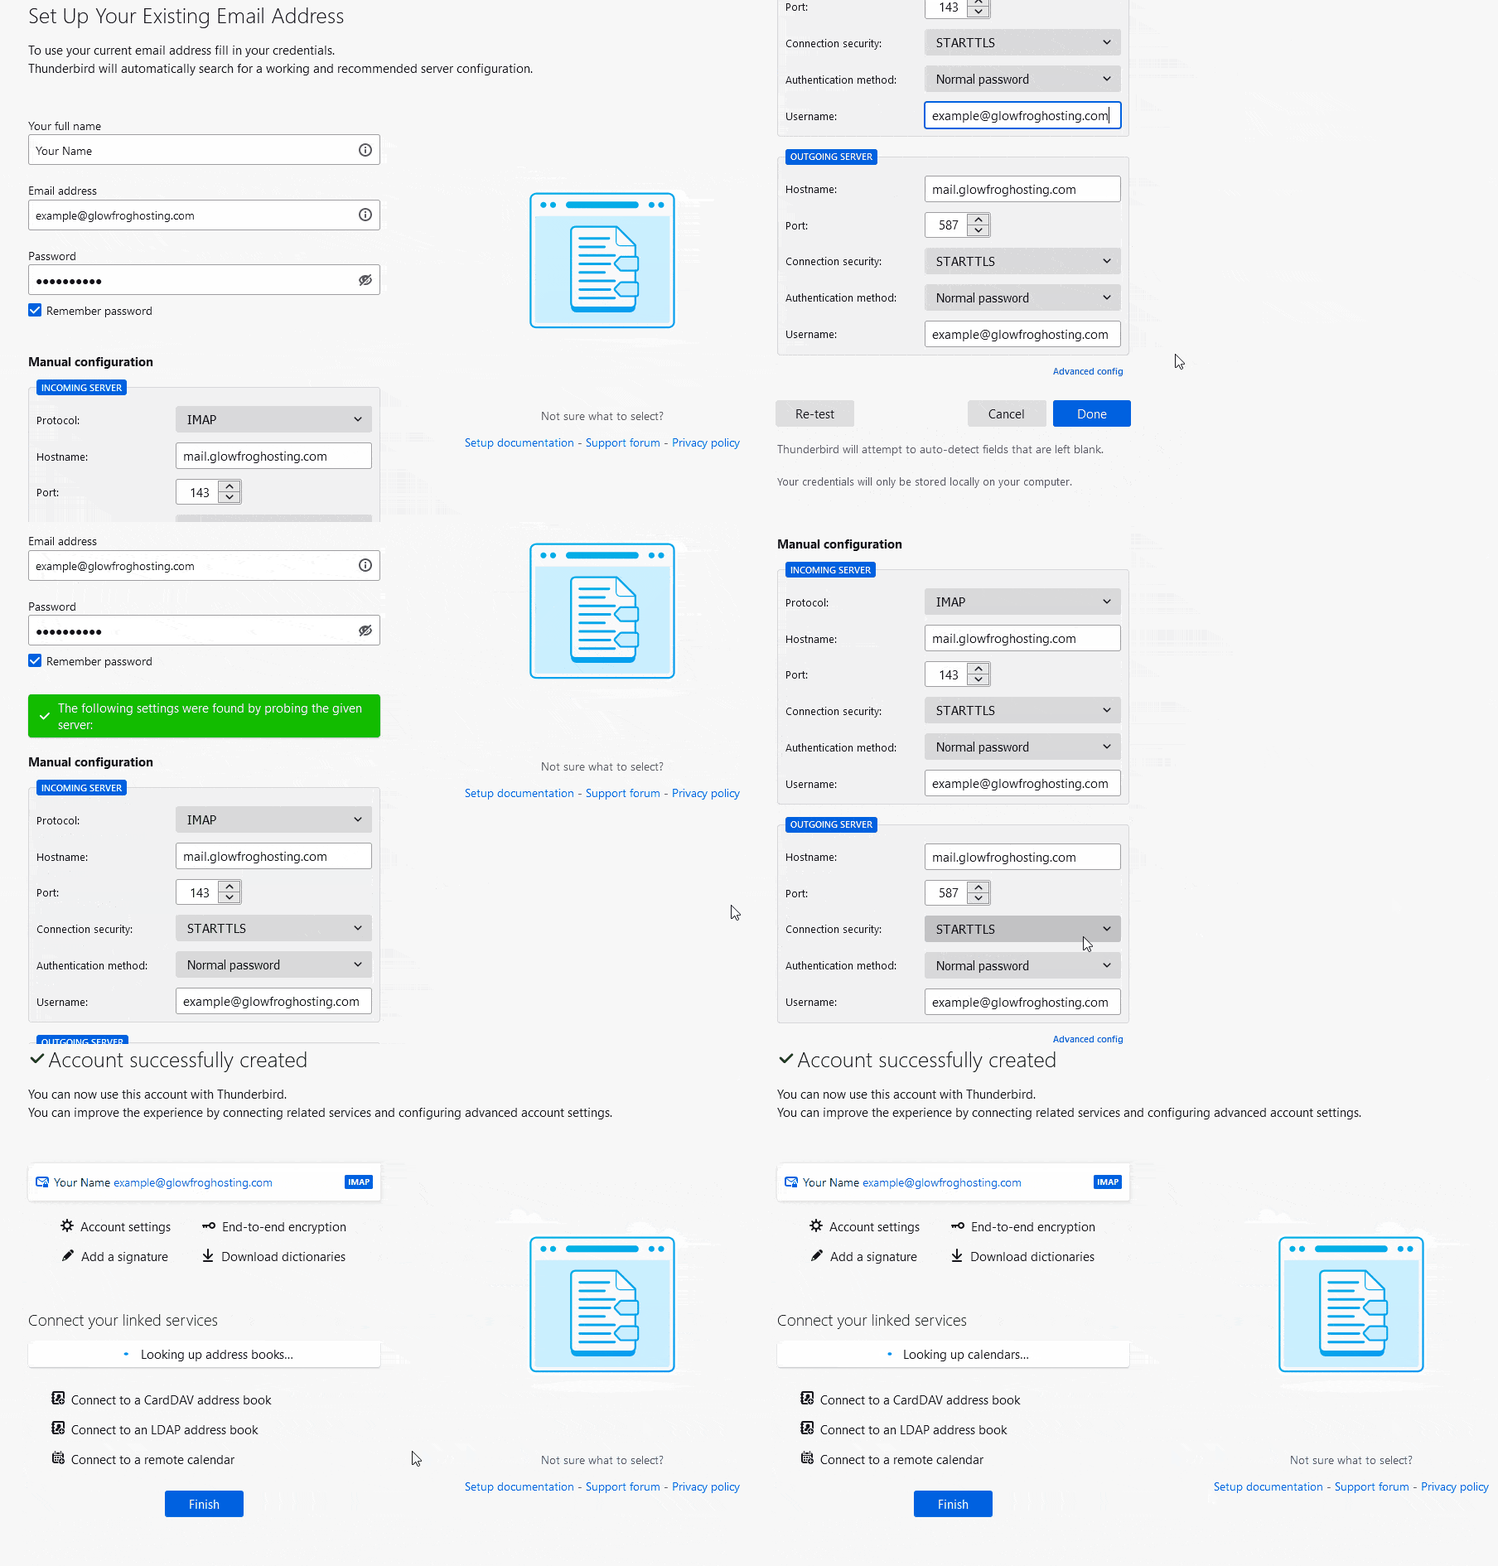
6. On the next screen, correct the email address username, and ensure the incoming and outgoing server settings are correct.
→ Refer to Where do I find my email settings? to locate the settings you’ll need for this screen.
Click ‘Retest‘ and Thunderbird should confirm the settings. Once confirmed, click ‘Done‘.
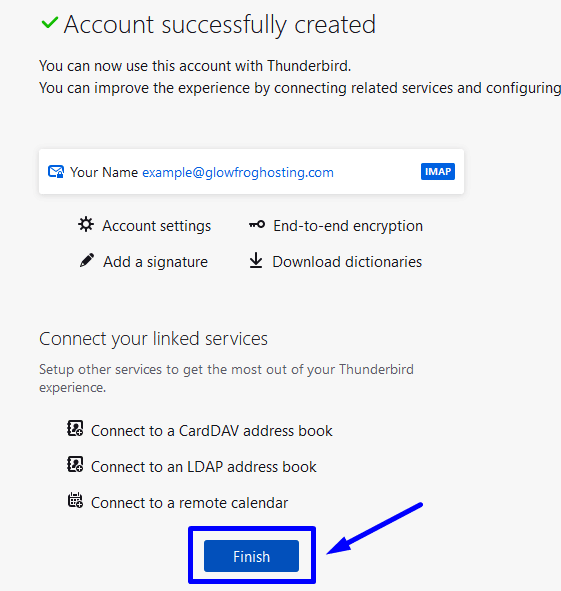
7. Click ‘Finish‘ to finish setting up the email account.
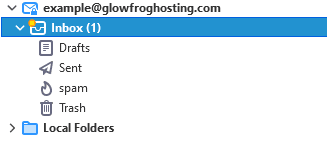
That’s it! You should now see your email inbox in Thunderbird where you will be able to check and send email for your domain.
How do I setup my email in Microsoft Outlook?
1. Open Outlook
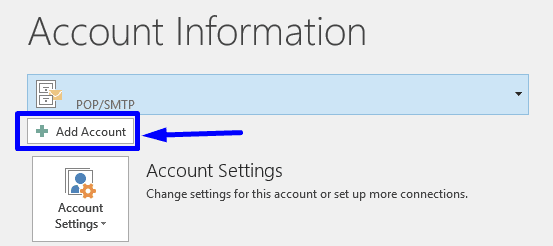
2. Select ‘File‘ > ‘Add Account‘.
3. On the next screen, enter your email address then select ‘Advanced options‘
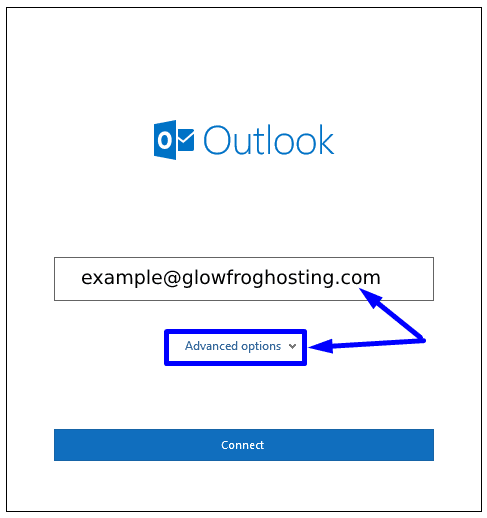
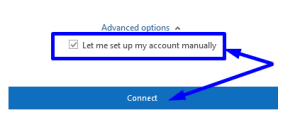
4. Check the box for ‘Let me set up my account manually’ and click ‘Connect‘.
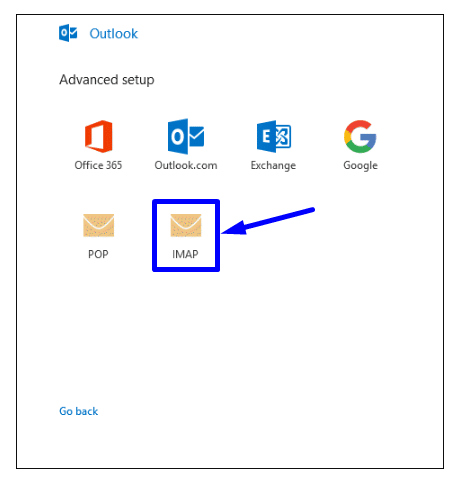
4. Select ‘IMAP‘ as the account type.
5. Enter your incoming and outgoing server settings and then select ‘Next‘.
→ Refer to Where do I find my email settings? to locate the settings you’ll need for this screen.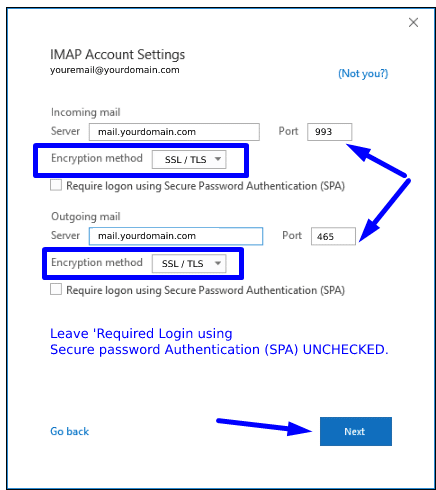
Note that, ‘Require Login using Secure Password Authentication (SPA)‘ Should ALWAYS remain UNCHECKED.
- The incoming email server is usually: mail.yourdomain.com.
- The outgoing email server is usually: mail.yourdomain.com
- Replacing yourdomain.com with your actual domain name.
- The incoming port should be: 993
- The outgoing port should be: 465
- Encryption Method should be: SSL/TLS
6. On the next screen, Enter your Email Account password and then select ‘Connect‘.
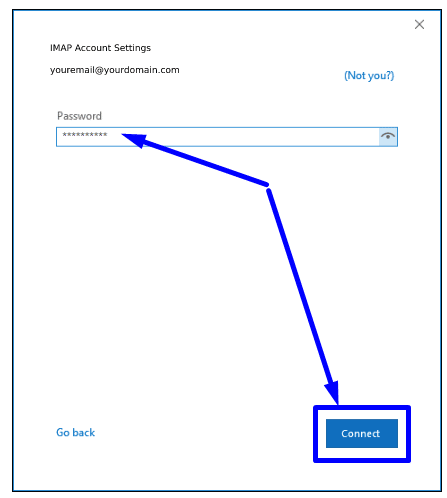
That’s it! You should now be able to download your email and send email from your email account.
Not a current GlowFrog customer? Sign up for one of our Managed WordPress plans and enjoy a free, fast migration within 24 hours.




Leave a Reply