Making a Backup your Website Files and databases on a regular basis is a good practice to have.
If you are using a PHP Web Based Application like WordPress there are times that you may need make an individual backup of your Database(s) as well.
Most CMS (Content Management Systems) rely heavily on a database which stores the majority of your website content.
At GlowFrog, you can backup your WordPress site files and databases in 1 click.
Not a current GlowFrog customer? Sign up for one of our Managed WordPress plans and enjoy a free, fast migration within 24 hours.
In this article, we will explain step-by-step how to make a backup of your database(s) in cPanel.
How to Make a Backup of Your Database in cPanel
There are two options in cPanel which allow you to make a backup of your Databases.
In this Guide:
→ Option #1 – BackUp Icon in cPanel
→ Option #2 – BackUp Wizard in cPanel
One of the options allows you to restore a backup you’ve created and the other simply downloads a database backup. We will outline both below.
Option #1 – BackUp Icon in cPanel
Making a backup of your databases in cPanel is simple:
1. Log Into cPanel
2. Click on the ‘Backup‘ Icon in cPanel:
![]()
3. Scroll Down to the ‘Download a MySQL Database Backup‘ Section.
4. Click on the name of the database you wish to download.

5. Clicking on the Database Name should have prompted a download in your Browser containing the Database Backup file.
The backup file name should end in “.sql.gz”. Be sure to move the backup to a safe location on your computer once the Download has completed.

That’s it! You’ve successfully created and downloaded a backup of your Database to your computer.
Option #2 – BackUp Wizard in cPanel
The backup wizard in cPanel guides you through making different types of backups for your website files and databases. You can also use the Backup Wizard to restore backups you’ve previously created using the Backup Wizard.
1. Log Into cPanel
2. Click on the ‘Backup Wizard‘ Icon in cPanel:

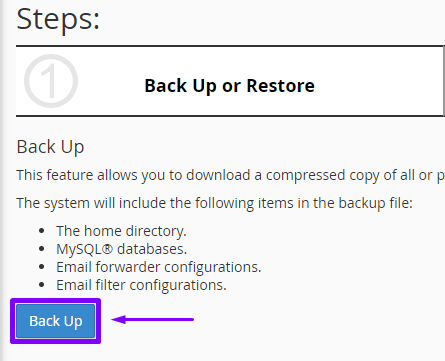
3. Click on the blue ‘Backup‘ Button

4. Under the ‘Select a Partial Backup‘ section, Select the option ‘MySQL Databases‘

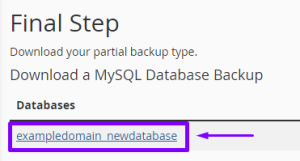
5. On the next page, click on the name of the Database to Download a Backup of the Database to your computer.

6. The Backup should begin downloading in your browser.

That’s it! You’ve successfully created and downloaded a backup of your Database to your computer. Remember to move the copy of the backup to a safe location on your computer. The backup should be a file that ends in “.sql.gz“.


