What is a phpinfo.php file? The purpose of the phpinfo.php file is to output information about the PHP settings and the current state of PHP in your hosting account. It’s useful in troubleshooting and confirming PHP changes and settings. In some instances where you need to adjust your PHP settings for WordPress it can be useful to view your phpinfo.php page to confirm that the changes are taking effect. In this article, we will discuss how to create a phpinfo.php page to view the current state of PHP in your hosting account for your domains.
The code you will need to paste into your phpinfo.php file:
<?php phpinfo(); ?>
How to Create a phpinfo.php File
Step 1. Login to cPanel
Step 2. Click on ‘File Manager‘
![]()
Step 3. Navigate into the document root of your website. (Note: the document root is the location where your website files are stored, usually ‘public_html’)
Step 4. In the top left-hand corner of File Manager, Click the plus icon to ‘Create a new File‘

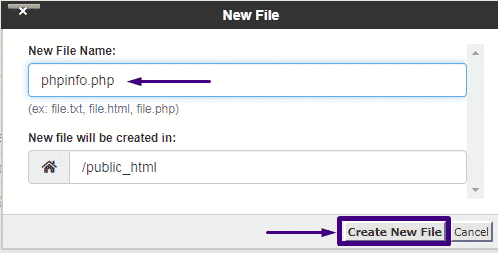
Step 5. Name the file ‘phpinfo.php‘ then click ‘Create New File‘

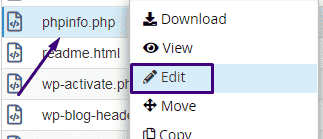
Step 6. Right-click the phpinfo.php file and select ‘Edit‘

Step 7. Paste the Following Code into the file:
<?php phpinfo(); ?>
Step 8. Save the file.
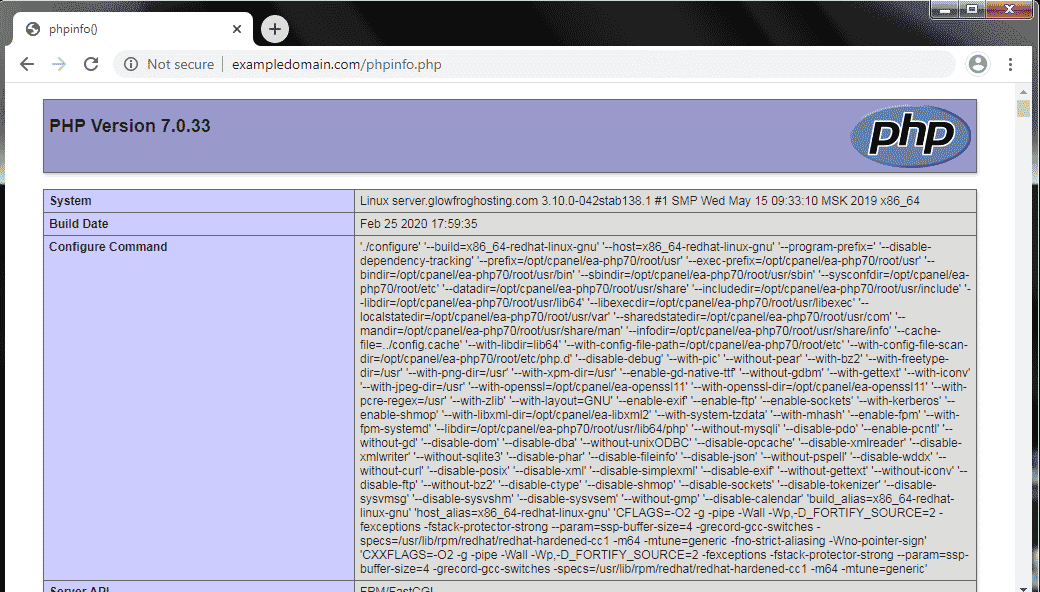
Step 9. Browse to the new file you created in your browser.
Example: mydomain.com/phpinfo.php
It will look something like the example below:

One of the most commonly viewed sections of the PHPinfo file is the section displaying the php directives as seen below:

This can be especially helpful when troubleshooting issues with WordPress and PHP. Here you can see what PHP directives the server is actually using. This way you can rule out PHP issues from the server and continue troubleshooting or change the PHP directives that need to be changed using the MultiPHP INI Editor in cPanel.
That’s it! Now you know how to create a phpinfo.php file.
Note! It is not recommended to leave this file accessible to the public as this can pose certain security risks. Once you are done using the file be sure to delete it.
Need to adjust your PHP settings like Max Execution Time, Memory Limit or Max File Uploads?
→ Click Here to View our Guide on How to Change these Settings Use MultiPHP INI Editor


