You can Upload your Files for your Website Using File Manager in cPanel. This article is a general guide on how you can upload files using cPanels File Manager.
If you are GlowFrog Customer, installing WordPress is easy. You can install WordPress in 1 click from your GlowFrog Dashboard.
In Another Guide:
→ See, Where do I upload my Files
→ How to Install WordPress from your GlowFrog Dashboard
→ How to Install WordPress Manually
How to Upload Files via File Manager in cPanel
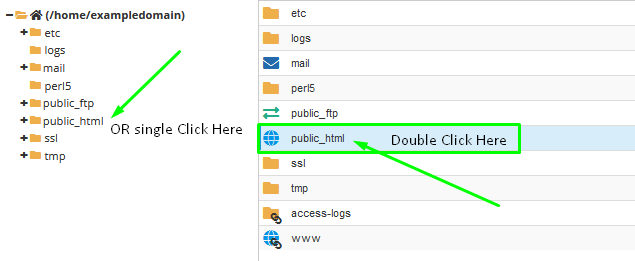
3. You Will be Redirected to File Manager. This is where all of your files for your website are stored. See Example Below:

4. To Upload a file, Browse to the Folder you wish to Upload your File(s) to by using the Navigation Pane on the Left or by Double Clicking on the Folder inside of the File Browser in the Center. In our Example, we will double click on ‘public_html’ to open up our Main Domain’s folder.
→ Not sure which folder to choose? See: Where do I Upload my Files?

5. You will now be shown the contents of the folder you’ve selected inside of the File Browser in the Center.
Click ‘Upload‘ to Upload your File(s) into the Current Folder.

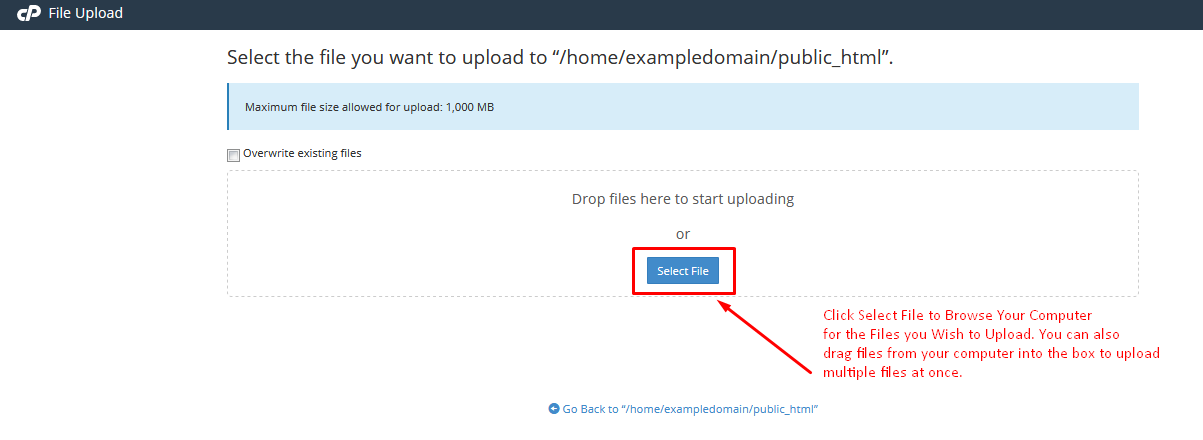
6. You will be redirected to the upload Screen.
Click ‘Select File’ to Browse Your Computer for the file you want to upload, or drag and drop files from your computer into the box to upload multiple files at once.

Where should you upload your Files? You should upload your files to the Document Root for your Domain.
→ See Where do I Upload my Files? for help finding the Document Root for your Domain.
At GlowFrog you can install WordPress in 1 click — without the need to use File Manager!
Not a current GlowFrog customer? Sign up for one of our Managed WordPress plans and enjoy a free, fast migration within 24 hours.


Leave a Reply