Are email messages from your domain going to your recipient’s SPAM folder?
Setting up Email Authentication records for your domain will improve email deliverability and increase the odds of emails from your domain arriving in your recipients’ Inbox versus the SPAM folder. In this article, we will discuss How to Setup SPF, DKIM and DMARC in cPanel.
In this Guide: How to Setup SPF, DKIM and DMARC in cPanel | How to Setup a DMARC Record
How to Setup SPF, DKIM and DMARC in cPanel
- Login to cPanel
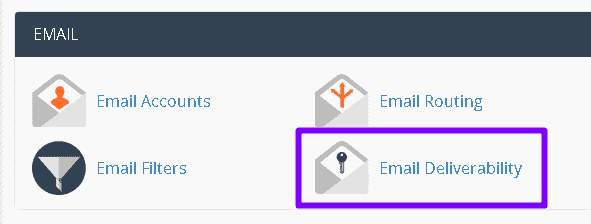
- Under the Email section, click on the ‘Email Deliverability‘ icon
- Locate the domain you want to setup SPF, DKIM and DMARC for and click ‘Manage‘

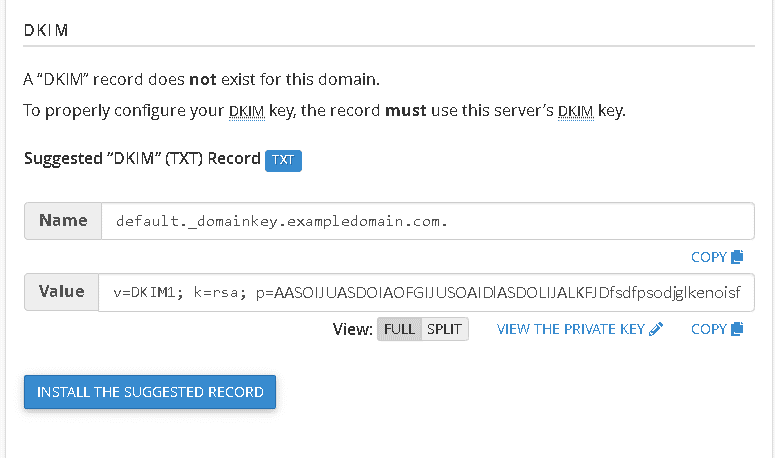
- Under the DKIM Section, click ‘Install the Suggested Record‘ to add your DKIM Record
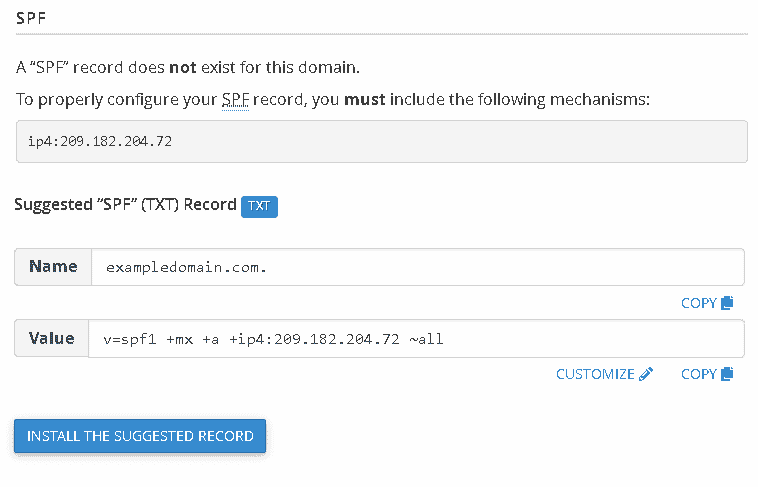
- Under the SPF section, click ‘Install the Suggested Record‘ to add your SPF record.
How to Setup a DMARC Record
- Login to cPanel
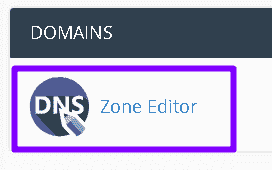
- Under the Domains section, Click on ‘Zone Editor‘
- Click ‘Manage‘ next to the domain you want to add the DMARC for

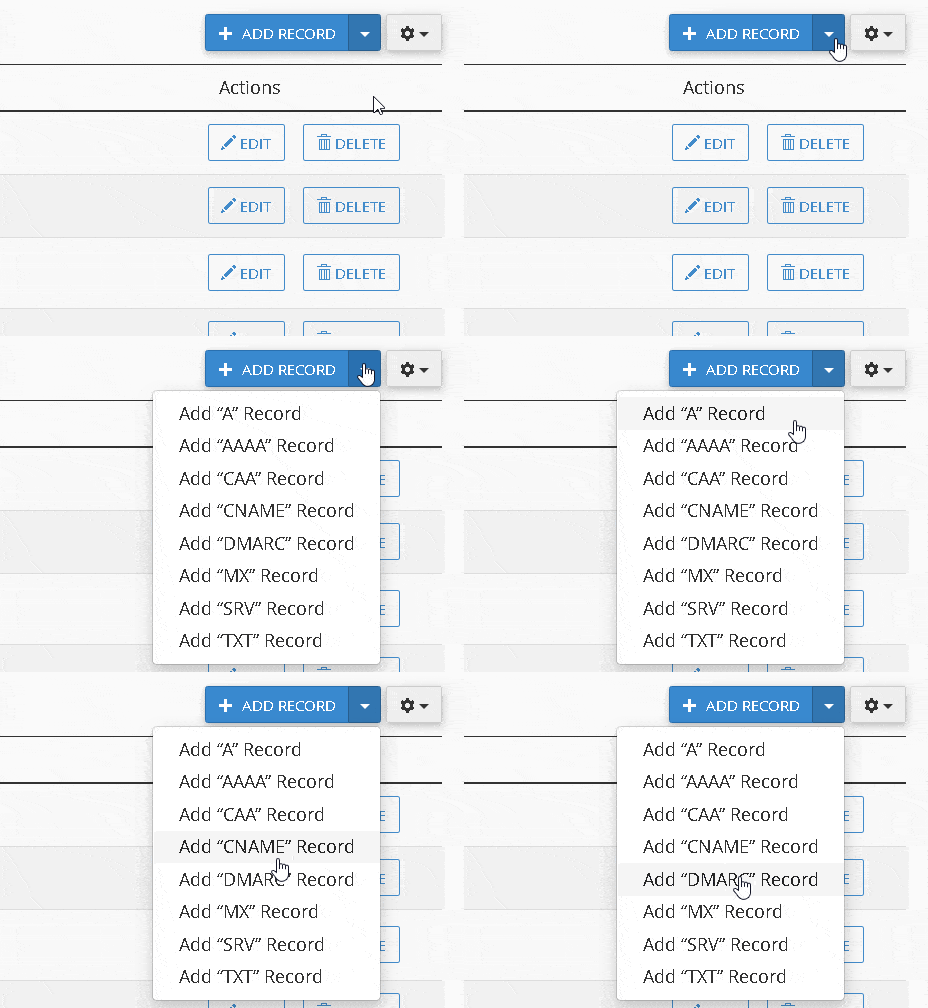
- Click on the arrow next to the ‘Add Record‘ button to activate the drop-down menu
- Select ‘Add DMARC Record‘ from the list
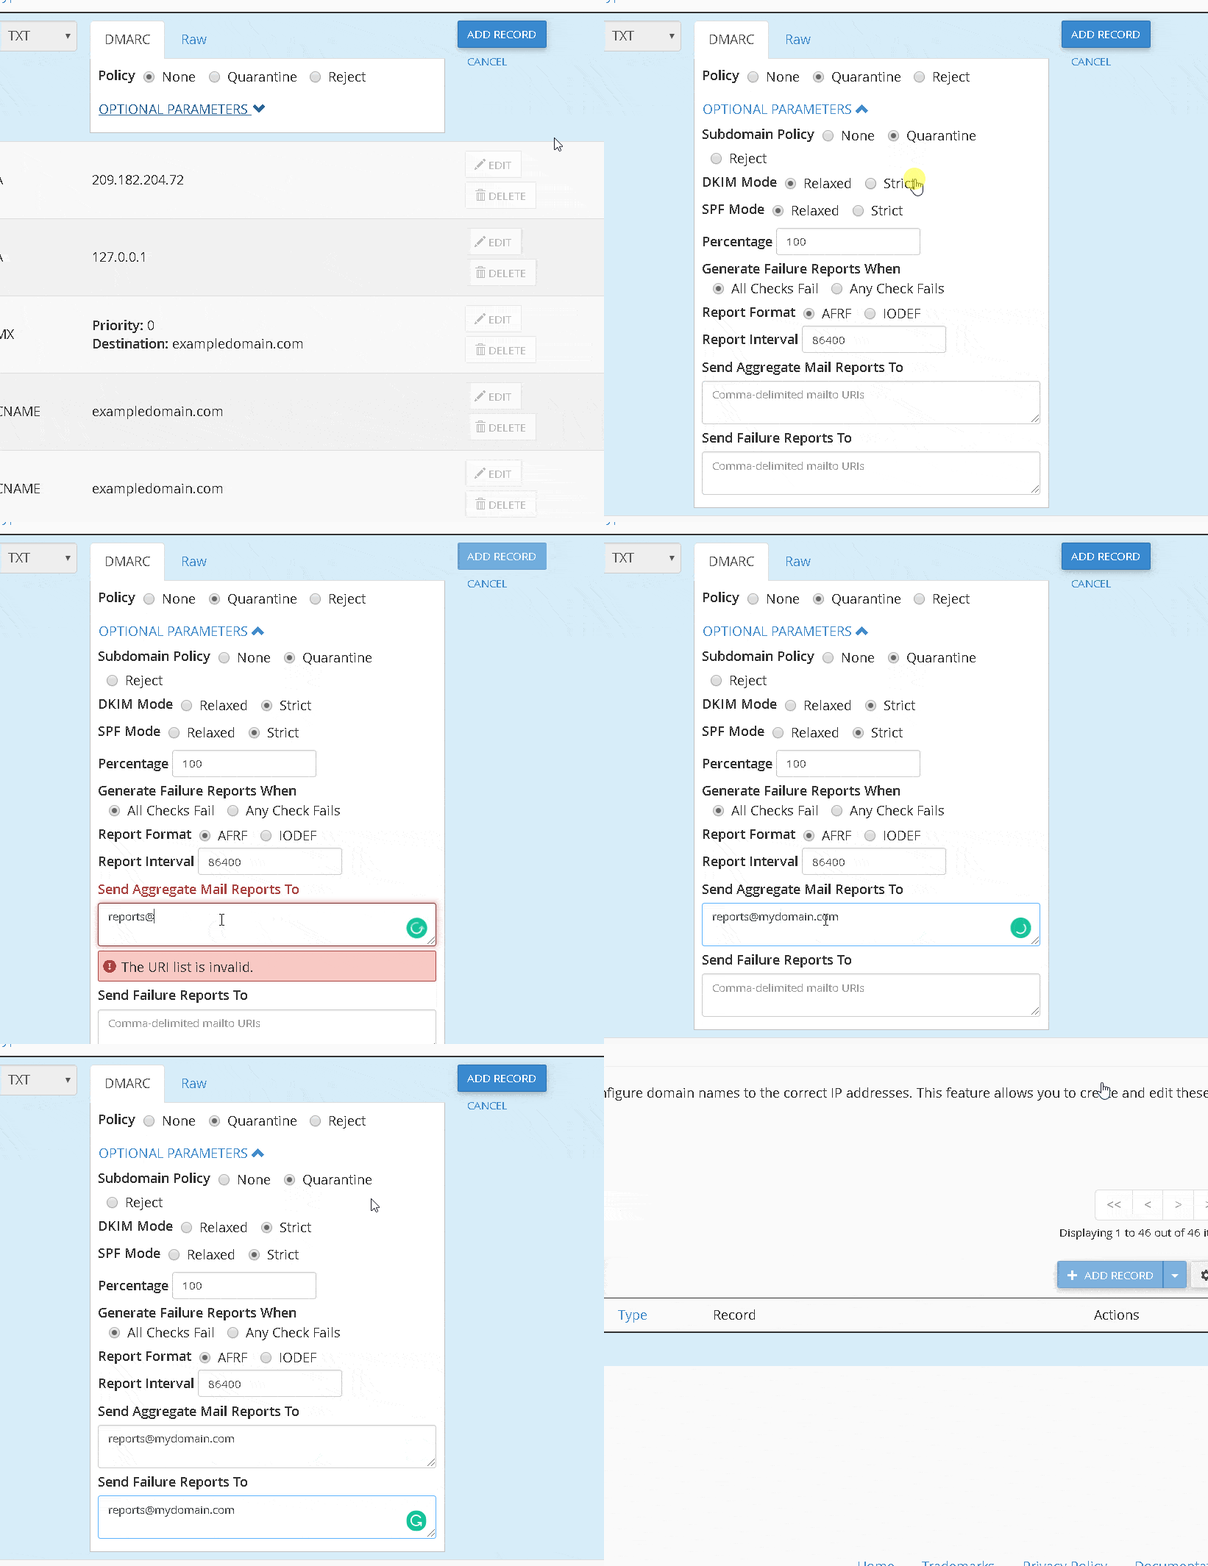
- Click on ‘Optional Parameters‘ to expand the options for the DMARC record

- Select ‘Quarantine‘ and ‘Strict‘ in both sections (or choose based on your preference)
- Enter an email address to send reports to in both the ‘Send Aggregate Mail Reports To‘ and ‘Send Failure Reports To‘ field
Note! If you are managing the DNS records for your domain elsewhere (like Cloudflare for example or via another DNS provider) you will need to copy these records over to your DNS provider.
You can view the RAW DMARC record to copy it and add it where the DNS is being managed for your domain.
That’s it! You’ve successfully added an SPF, DKIM and DMARC record for your domain. These records are DNS records.
It will take some time for these records to become fully effective as this is a DNS change. DNS changes incur a period of time known as DNS propagation (read more about DNS propagation here).


