How to Change WordPress from HTTP to HTTPS/SSL – The Importance of Having an SSL
How to Change a WordPress Website from HTTP to HTPS/SSL in a few simple steps! See the simple version in the Knowledge Base. If you’ve created a WordPress website, odds are the URL was set up as HTTP by default. So how do you change a WordPress Website from HTTP to HTTPS/SSL? In this guide, we will go over how to enable HTTPS in your WordPress Website and move from HTTP to HTTPS. Scroll down for the steps.

Why would you want to do this?
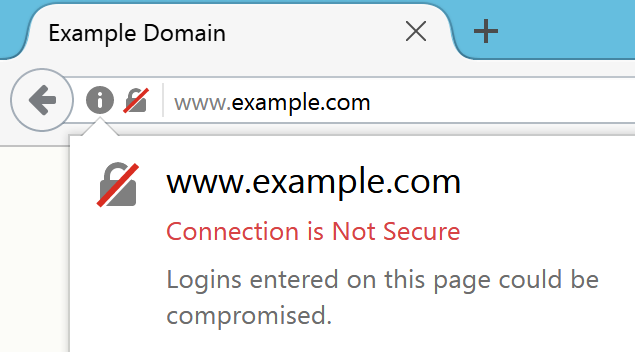
All sites without an SSL will display a warning to Google Chrome Users. Yikes! Since Google’s recent pledge to increase security and label all HTTP sites and Not Secure in Google Chrome Browsers and the negative impact it will have on your SEO, you will be wanting to move your WordPress website from HTTP to HTTPS and avoid the nasty Website is Not Secure message ASAP!
You can read about this on Google’s Blog Here: https://www.blog.google/products/chrome/milestone-chrome-security-marking-http-not-secure/
You will need an SSL certificate for this to work. View our FreeSSL guide or Click here to Purchase an SSL. Not sure which one to get? View our Free vs Paid SSL Guide.
Enabling HTTPS in WordPress
- Log into the WordPress Dashboard.
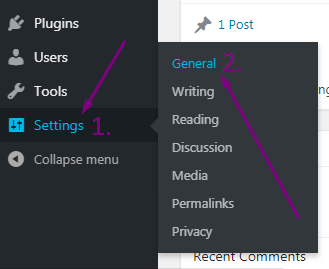
- Hover over Settings in the navigation menu, then click on General:

- In both the WordPress Address (URL) field and the Site Address (URL) field, enter https:// in front of the address:

- Scroll down and Click on the Save Changes button on the bottom.
If the change was successful, you will see a “Settings saved” message.
That’s it! You should now be able to browse to your WordPress site over an SSL connection and your website should show up as HTTPS:// in the address bar.
We Recommend Using the Really Simple SSL Plugin, to help finish converting your WordPress Site to HTTPS completely and solve Mixed Content Issues and Warnings.


