


This guide covers How to Configure SMTP Authentication in WordPress. There are many reasons you may need to Configure SMTP Authentication in WordPress.
Specifically for the server here, email from your Contact forms or from your Website will not be delivered until you do so. This is because the server here is secure and requires SMTP authentication to send email.
This means that all websites must authenticate with a valid email address and password to send email including messages from your contact forms, otherwise known as form mail. This guide outlines how to Configure SMTP Authentication in WordPress to allow your Website to Send and Deliver Email.
What is SMTP Authentication?
SMTP refers to outgoing email. In layman’s terms, SMTP authentication just means logging in with an email address and password and authenticating on the server to send mail versus sending email via PHP Mailer Scripts as Nobody. It is a more secure means to send email.
Configure SMTP Authentication Using WP Mail SMTP
First you will need to create an email address that you will use specifically for delivering contact form messages and emails from your website. You can do this in cPanel via the following steps:
- Log into cPanel
- Create Your Email Account for Delivering Form Mail. Example: formmail@exampledomain.com
- Log into Your WordPress Dashboard
- Install and activate the WP Mail SMTP Plugin. Click Here for Help Installing WordPress Plugins

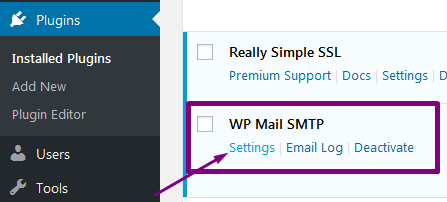
- In the Plugins List, click on Settings underneath the WP Mail SMTP Plugin to Configure the plugin.
- In the General Section, in the From Email field, Enter the Email Address you created in cPanel for delivering your form mail in step 2.


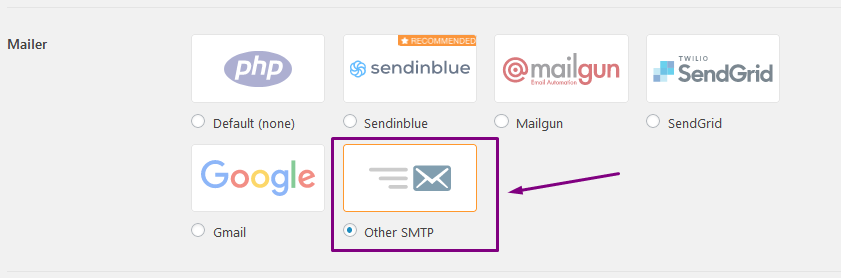
- Under the Mailer section, select Other SMTP as the method.
 Configure the SMTP settings using the settings for your email account. You can view the email settings for your email account in cPanel.
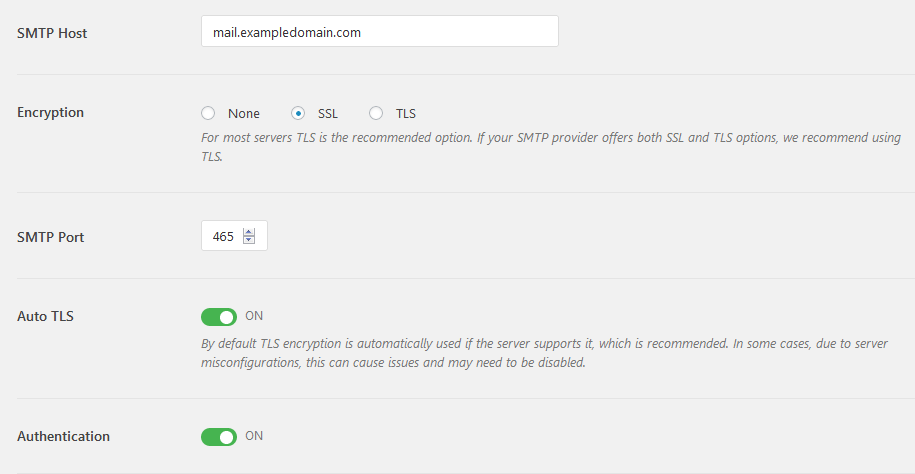
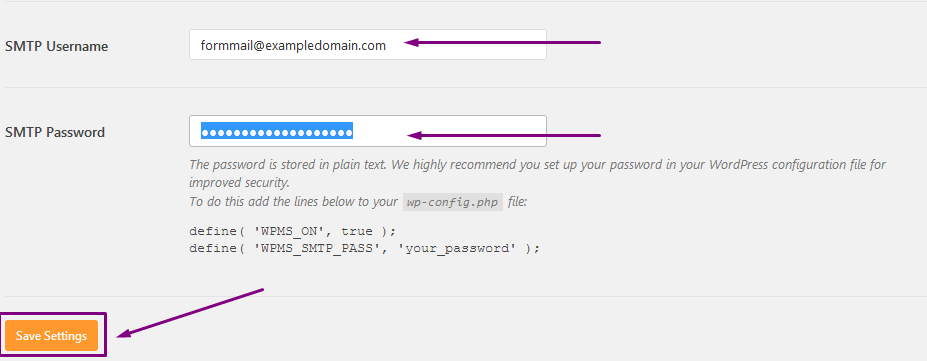
- Enter the Email Address and Password (created in step 2) responsible for sending your email on behalf of your website.
- Click ‘Save Settings‘ at the bottom of the page.
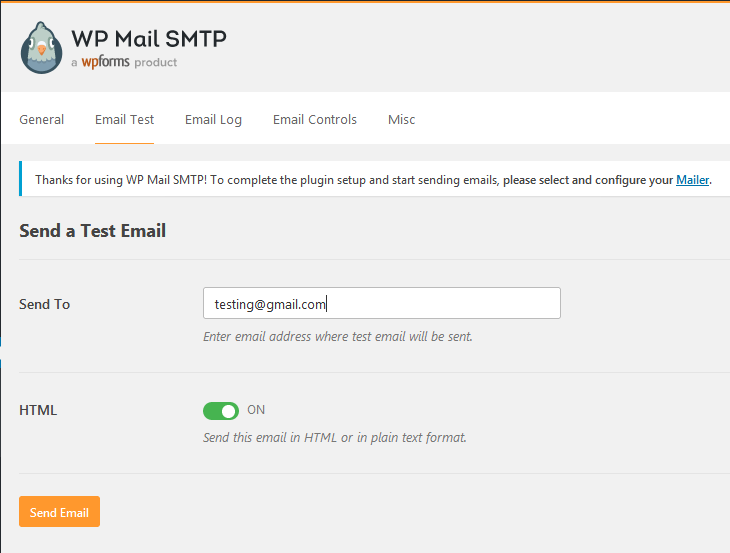
- Test your settings. Scroll up to the Top of the Page and click on ‘Email Test‘
- Enter en email address to send a test message to. We recommend using an email address separate from your domain such as a Gmail Address.
 Be sure to Check your Spam Folder to ensure delivery of your form mail. Emails going to SPAM? Click Here for Help Stopping Email from your Domain from Going to Spam!
That’s it! You’ve successfully enabled SMTP Authentication for your WordPress website.
Not a current GlowFrog customer? Sign up for one of our Managed WordPress plans and enjoy a free, fast migration within 24 hours.
")